Storm-Proof Your Greenhouse: Essential Tips
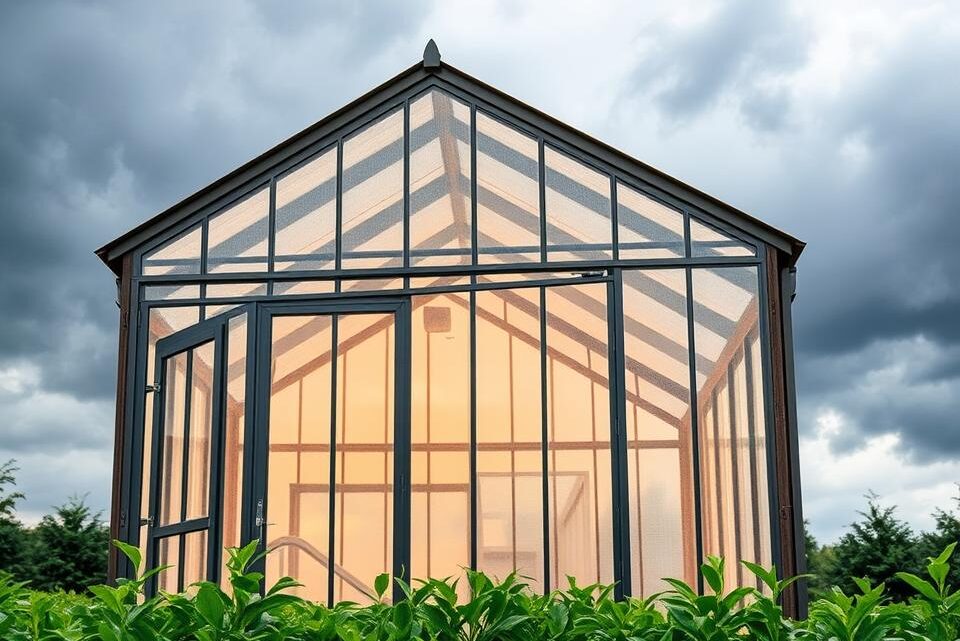
This guide explains practical, evidence-based steps for making a greenhouse storm-proof in the UK’s changeable climate. It sets out the article’s purpose: to help hobby gardeners, allotment holders, small-scale growers and landscapers protect glass and polycarbonate structures from high winds, heavy rain and coastal salt spray.
The meta summary is clear — safeguarding gardening efforts with essential tips tailored to UK weather extremes. Readers will find actionable advice on greenhouse storm protection, measures to boost greenhouse resilience, and guidance on UK greenhouse safety, all aimed at reducing repair costs and protecting plants and equipment.
The article draws on authoritative sources, including UK Met Office wind and storm data, Centre for Window and Cladding Technology best practice for glazing, manufacturer guidance from Halls, Palram and Burgon & Ball, and typical cover notes from UK insurers for garden structures. Following this guidance will help you achieve a more storm-proof greenhouse and clearer steps for insurance and legal compliance.
Inhaltsverzeichnis
Key Takeaways
- Making a greenhouse storm-proof reduces repair costs and protects plants and equipment.
- Practical measures improve greenhouse resilience and overall UK greenhouse safety.
- Use guidance from the Met Office and manufacturers such as Halls and Palram.
- Understand insurer expectations for garden structures before severe weather.
- Small retrofits and correct siting can significantly improve storm resistance.
Understanding the Risks to Greenhouses in UK Weather
Greenhouses face a range of threats from British weather. Owners should recognise the main hazards, how seasonal shifts change risk, and how a practical site exposure assessment cuts likelihood of severe damage.
Common storm hazards affecting greenhouses
High winds can uplift frames, distort structure and blow out glazing. Flying debris from nearby trees or garden furniture increases impact risk. Heavy rain and flash flooding cause water ingress, rot in timber bases and weakened foundations.
Hailstones chip glass and polycarbonate. Snow loads in prolonged cold snaps risk collapse. Coastal sites suffer salt-laden winds that speed corrosion on aluminium and steel fittings. Torn vents and broken doors bring temperature swings that harm plants.
Seasonal weather patterns and regional differences in the UK
Autumn and winter bring the most frequent severe storms as Atlantic systems drive extratropical cyclones and gales across the UK. Spring is changeable with late frosts and sudden high winds during transitions.
Summer storms are sporadic yet intense; thunderstorms deliver localised high winds and hail, especially over southern and eastern England. Western and northern coasts typically see higher wind exposure, while East Anglia is drier but can still face strong gusts. Scotland and Northern Ireland experience more frequent frontal systems.
Use Met Office wind-rose and storm records to match local patterns to greenhouse design and reduce exposure to UK wind hazards.
Assessing your greenhouse location and exposure
A site exposure assessment should map prevailing wind directions, proximity to trees and buildings, local slopes and drainage. Note whether the site is sheltered, semi-exposed or exposed.
Sheltered sites sit behind buildings or hedges. Semi-exposed plots have partial protection. Exposed locations include ridgelines and seaward edges. Avoid ridge tops and full-exposure coastal edges if possible.
Practical steps include adding windbreaks, orienting the greenhouse to minimise face-on winds and accounting for microclimates from nearby walls or paving that change thermal behaviour and storm dynamics.
| Risk | Effect on greenhouse | Mitigation |
|---|---|---|
| High winds | Uplift, frame distortion, glazing blowouts | Secure anchors, low-profile siting, windbreaks |
| Heavy rain / flooding | Water ingress, timber rot, foundation washout | Raised bases, improved drainage, flood-proof barriers |
| Hail and snow | Panel damage, collapse under weight | Impact-resistant glazing, reinforced roof structure |
| Salt-laden coastal winds | Corrosion of metal frames and fittings | Use stainless or galvanised steel, regular maintenance |
| Nearby trees and debris | Broken panes, structural punctures | Prune or remove hazards, clear perimeter |
Making a Greenhouse Storm-Proof
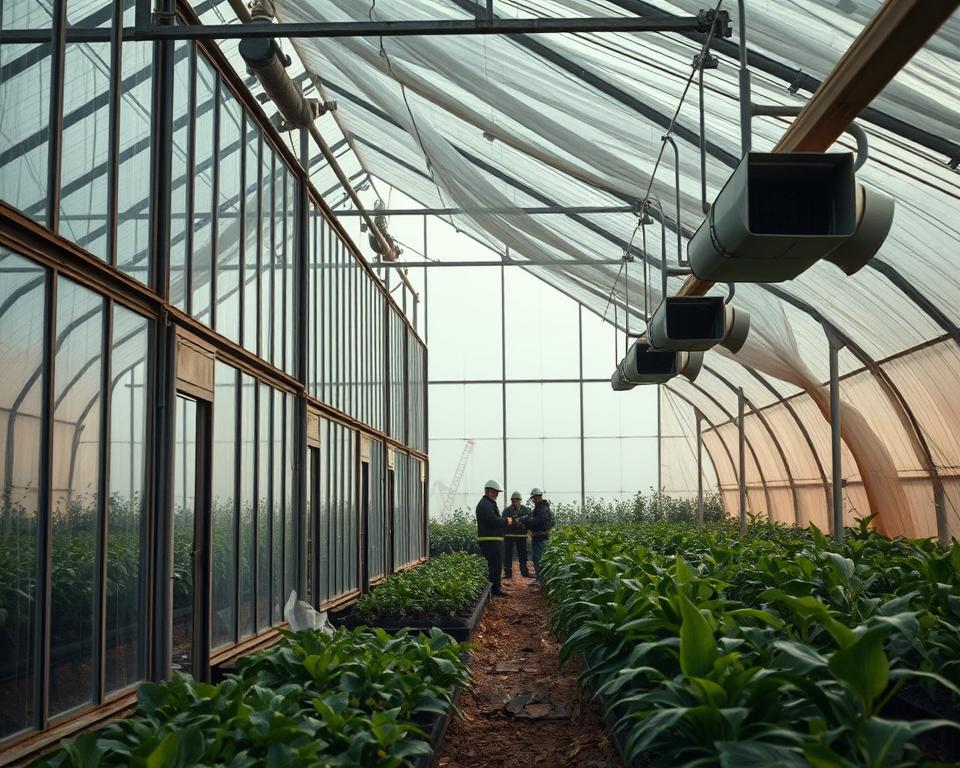
Preparing a greenhouse for severe weather begins with clear, practical steps. Focus on how forces travel through the structure, which parts carry the load and where failures are most likely. Follow basic greenhouse resilience principles to guide any upgrade or new build.
Primary principles of structural resilience
Create continuous load paths so wind pressure passes from glazing and roof through the frame to secure foundations. Add redundancy by increasing fixing points and overlapping supports to prevent single-point collapse. Shape the building to reduce uplift and vortices; lower eaves and smooth rooflines cut wind forces. Use robust connections such as stainless-steel or hot-dip galvanised bolts, washers and brackets rated for outdoor use.
Materials and designs that withstand high winds
Select heavier-duty frames like galvanised steel or reinforced aluminium with cross-bracing and ridge straps to resist deformation. Multi-wall polycarbonate is tough and insulates well. Tempered safety glass can be strong under static loads but may shatter from impact; weigh performance against risk. Low-profile lean-to styles and hoop houses often perform better than tall gable greenhouses when wind is extreme, provided anchorage is solid. Check manufacturers such as Halls, Hartley Botanic and Palram for wind ratings and choose models with proven specs.
Retrofitting existing greenhouses for improved durability
Start retrofit greenhouse storm-proofing by adding cross-bracing, extra frame anchors and stronger gutter-to-base fixings. Replace single-skin glazing with twin- or multi-wall polycarbonate and fit anti-throw beading plus additional cleats to hold panels during gusts. Strengthen doors with extra hinges, robust latches and internal bars to stop wind levering.
Bolt frames to concrete footings or ground screws when possible and upgrade mild-steel fixings to galvanised or stainless alternatives. For complex upgrades, use a professional installer and review manufacturer warranty terms before altering the original structure. These steps reflect core greenhouse resilience principles and target the main failure points in typical builds.
| Issue | Practical retrofit | Expected benefit |
|---|---|---|
| Frame flexing | Install cross-bracing and ridge straps; upgrade to reinforced aluminium or galvanised steel | Reduced deformation and longer structural life |
| Panel blowouts | Fit anti-throw beading, extra cleats, replace with multi-wall polycarbonate | Improved impact resistance and retention |
| Uplift at base | Bolt to concrete footings or ground screws; add continuous load path fixings | Greater resistance to uplift and overturning |
| Door failure | Fit additional hinges, stronger latches and internal reinforcement bars | Prevents wind levering and unauthorised entry |
| Corrosion of fixings | Replace mild-steel bolts with stainless-steel or hot-dip galvanised fasteners | Longer-lasting connections and consistent load transfer |
Choosing the Right Greenhouse Design and Materials
Selecting glazing and structure affects how well a greenhouse weathers strong winds and heavy rain. A clear choice early on saves repair bills and keeps plants safe. Below are practical comparisons and design tips to help pick the best combination for exposed UK sites.
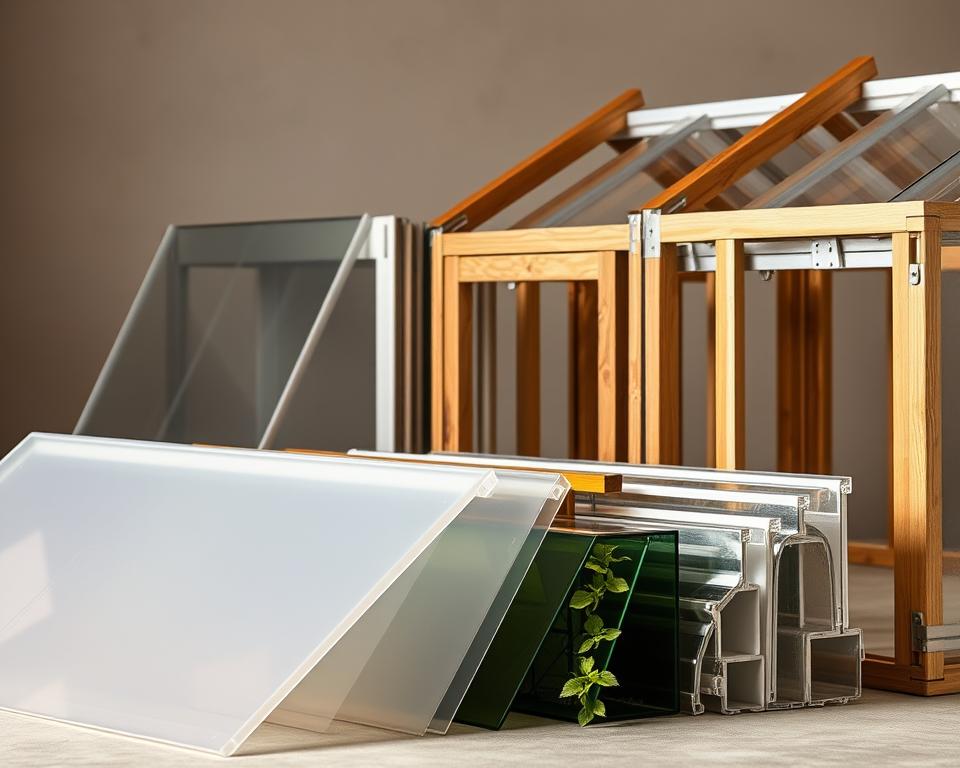
Comparing glazing options
Glass gives excellent clarity and long life. Toughened glass reduces shard risk and meets safety rules, but the weight raises demands on the frame. Use glass where appearance and light transmission are priorities.
Multi-wall polycarbonate balances strength and lightness. Sheets from 10–16 mm offer good thermal insulation and impact resistance. For storm-prone gardens, polycarbonate often beats other options in the polycarbonate vs glass debate.
Polyethylene film costs less and suits polytunnels or temporary covers. It rips more easily and traps less heat, so it suits short-term or seasonal use rather than permanent, storm-resistant builds.
Frame material choices
Aluminium resists corrosion when anodised or powder-coated. It is light and easy to assemble. Ensure section sizes and bracing are adequate for exposed positions.
Timber offers a warm look and natural insulation. Treat timber with preservative and keep maintenance regular to avoid rot and decay driven by wind-driven moisture.
Galvanised steel delivers the greatest stiffness and load capacity. Hot-dip galvanised or painted finishes protect against rust. For exposed sites, choose thicker sections and firm cross-bracing to get the best performance from greenhouse frame materials.
Use stainless-steel or hot-dip galvanised bolts and coach screws to prevent galvanic corrosion where different metals meet.
Design features to reduce wind load
Lower eaves and moderate roof slopes limit uplift and reduce the risk of wind catching the structure. Rounded or lean-to profiles cut down vortex formation and turbulent gusts.
Cross-bracing in gable ends and closer purlin spacing spread loads across the frame. Shorter spans and intermediate posts break up large unsupported areas. These measures help to reduce wind load greenhouse risks.
Minimise overhangs and decorative elements that catch the wind. Consider modular panels so vulnerable sections can be removed before a storm. Thoughtful choices in glazing and frame pairings provide the best balance between strength, cost and daily performance.
Anchoring and Foundation Solutions for Stability
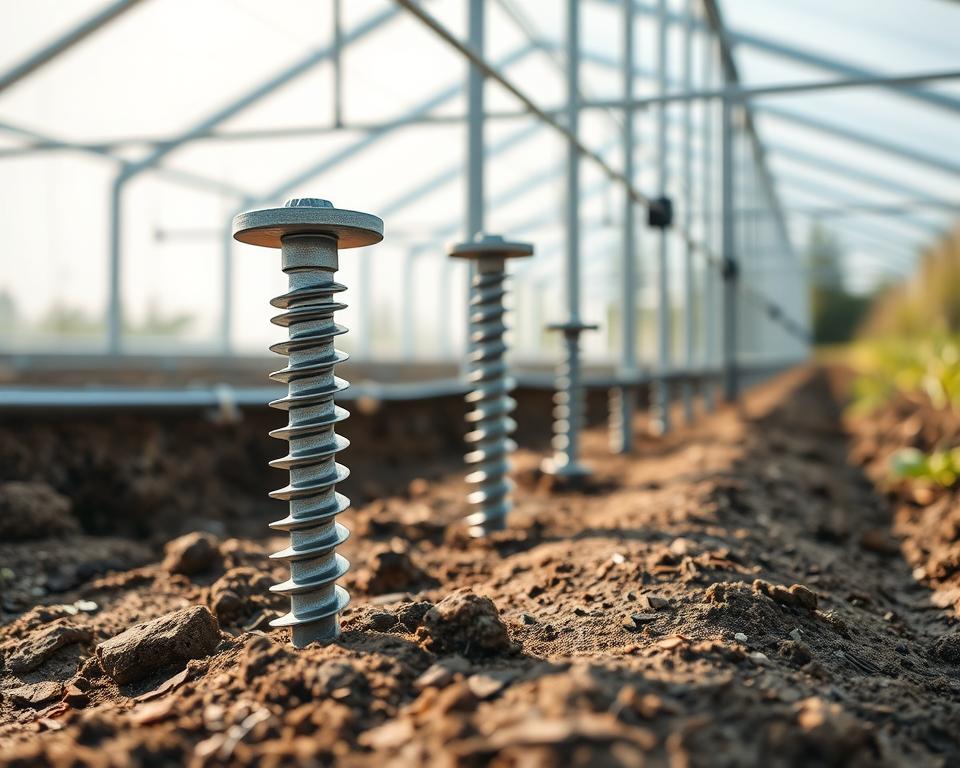
A secure base keeps a greenhouse standing through strong gusts. Choose anchoring and foundation methods that match soil type, structure weight and local wind exposure.
Types of anchors and when to use them
Earth anchors, such as screw or helical anchors, suit soft to medium soils. They install quickly and give good lateral and uplift resistance for light-to-medium frames.
Driven anchors—steel rods or stakes—work for temporary or low-cost setups. They are simple to fit but can pull out in loose ground under severe uplift.
Chemical anchors use resin-bonded studs for fixing into concrete or masonry. Use these for permanent fixings to existing slabs or bases.
Baseplate bolting onto a concrete slab provides the strongest connection for heavy frames. This method is ideal where maximum stability is required.
Concrete footings versus ground screws
Concrete footings are durable and suit heavy, permanent greenhouses. Expect excavation, curing time and planning. Use concrete footings greenhouse where you need the greatest resistance to overturning and long-term settlement control.
Ground screws are less disruptive and faster to fit. They work well for retrofits and many soil types. Brands such as Gripple and helical anchor suppliers publish load ratings; choose screw diameter and depth guided by wind-load calculations.
Concrete can demand drainage planning and more site work. Ground screws reduce ground disturbance, which helps when planning permission or neighbours are concerns.
Ensuring level foundations to prevent uplift
Level foundations distribute loads evenly. An uneven base can concentrate forces and allow partial uplift during gusts. Check levels with a spirit or laser level as you work.
Look for signs of subsidence and seasonal ground movement. A continuous concrete perimeter beam or a treated timber dwarf wall fixed to anchors gives lateral stability and acts as a plinth against splash and damp.
Include drainage around foundations to avoid waterlogging and freeze-thaw damage. Good drainage helps prevent greenhouse anchors loosening and helps prevent greenhouse uplift over time.
Reinforcing Panels and Glazing for Storm Conditions
Good panel fixing and smart glazing choices keep a greenhouse standing through strong winds and driving rain. This short guide explains how to secure panels, the best impact-resistant glazing choices and simple sealing steps to create a weatherproof greenhouse that lasts.
Securing panels and preventing blowouts
Fit glazing with the manufacturer’s beading and gasket systems and space screws as recommended. Use secondary clips or cleats at panel ends and corners to lock panels in place and prevent glazing blowouts under wind uplift.
Inspect and replace brittle EPDM seals and gaskets regularly; UV and cold make them fail. For polycarbonate, install correct end closures, leave manufacturer-specified ventilation gaps and use compatible tape to stop water ingress and debris entry.
Fix polycarbonate to purlins with neoprene washers and correctly sized screws. Where possible, overlap panels or use positive interlocking systems for extra holding power and to further prevent glazing blowouts.
Impact-resistant glazing options
Twin- and multi-wall polycarbonate sheets absorb impacts from hail and flying debris. Sheets in the 10–16 mm range offer a good balance of insulation and strength for many UK gardens.
Toughened glass and laminated safety glass reduce the risk of dangerous shards after impact. Laminated glass keeps fragments in place but adds weight and cost. For short-term protection during severe forecasts, fit external polycarbonate storm sheets over glass.
Consult manufacturers such as Palram and Lexan for impact-test data and recommended thicknesses when choosing glazing for exposed sites.
Sealing and weatherproofing to reduce water ingress
Use high-quality silicone or MS polymer sealants for external joints and check compatibility with plastics before sealing polycarbonate. Maintain gutters and downpipes so leaves or debris cannot block drainage and force water into vulnerable areas.
Fit base flashing and upstands to prevent splashback and soil-borne damp from entering through plinths. Reseal or replace seals at doors and vents as part of seasonal maintenance to keep a weatherproof greenhouse effective.
Raise thresholds or fit drip edges where flooding risk exists. Small steps like these reduce water entry and help keep internal structures dry and secure during storms.
Ventilation and Door Protection Strategies
Good ventilation and robust door fittings keep a greenhouse stable in changing weather. Small fixes prevent damage and protect plants. The advice below focuses on practical solutions you can fit yourself or with a local fitter such as a joiner or greenhouse specialist.
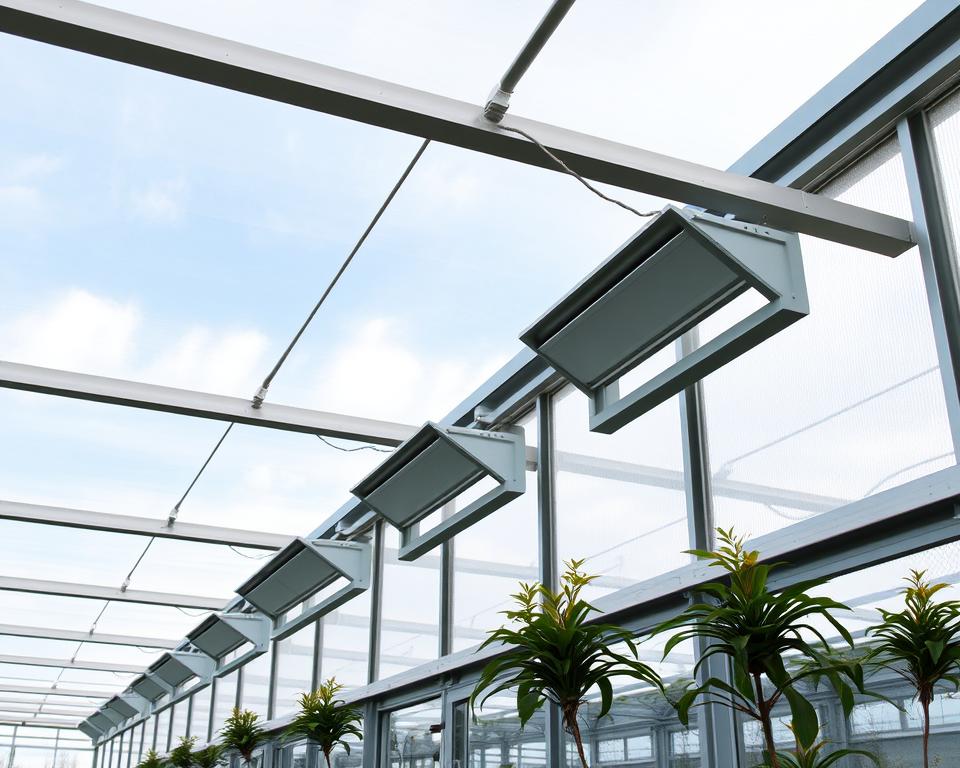
Choose vents with solid hinge systems and friction stays that lock at partial openings. These let you adjust airflow while stopping sudden slams in gusts. Fit louvers where wind cannot lever them open and consider internal venting where possible to reduce exposure.
Place wind baffles or external screens on windward sides to lower direct pressure. Fit automatic openers from reputable makers like Heron or Opus, but site them protected from strong gusts to avoid damage.
Reinforcing doors and latches
Strengthen door frames with extra hinge plates and longer coach bolts to spread load across the frame. Anti-lift fittings stop wind from peeling doors free. These measures help to reinforce greenhouse doors against uplift and twisting.
Use heavy-duty hasps, slam-shut latches and padlockable catches for secure closure during warnings. For severe weather, consider removable internal bars or cross-braces that lock a door in place from the inside.
Emergency ventilation and controlled closures
Plan procedures for controlled vent and door closures to avoid heat stress or condensation for plants. Time closures by checking forecasts and act early to reduce repeated slamming.
Install thermostatic or electronic controllers for vents and heaters with a manual override for emergency greenhouse closure. Keep simple checklists and clear signage by entries so anyone can secure the greenhouse quickly when alerts come in.
- Fit wind-resistant vents greenhouse components where they face prevailing wind.
- Take steps to reinforce greenhouse doors with better hinges and anti-lift fittings.
- Prepare for emergency greenhouse closure with controllers and a short checklist.
Internal Layout and Anchoring of Plants and Equipment
A tidy greenhouse internal layout cuts damage risk and speeds actions when a warning is issued. Start with fixed zones for heavy items, workspaces and delicate stock. Plan routes wide enough for quick movement and temporary storage of pots and trays.
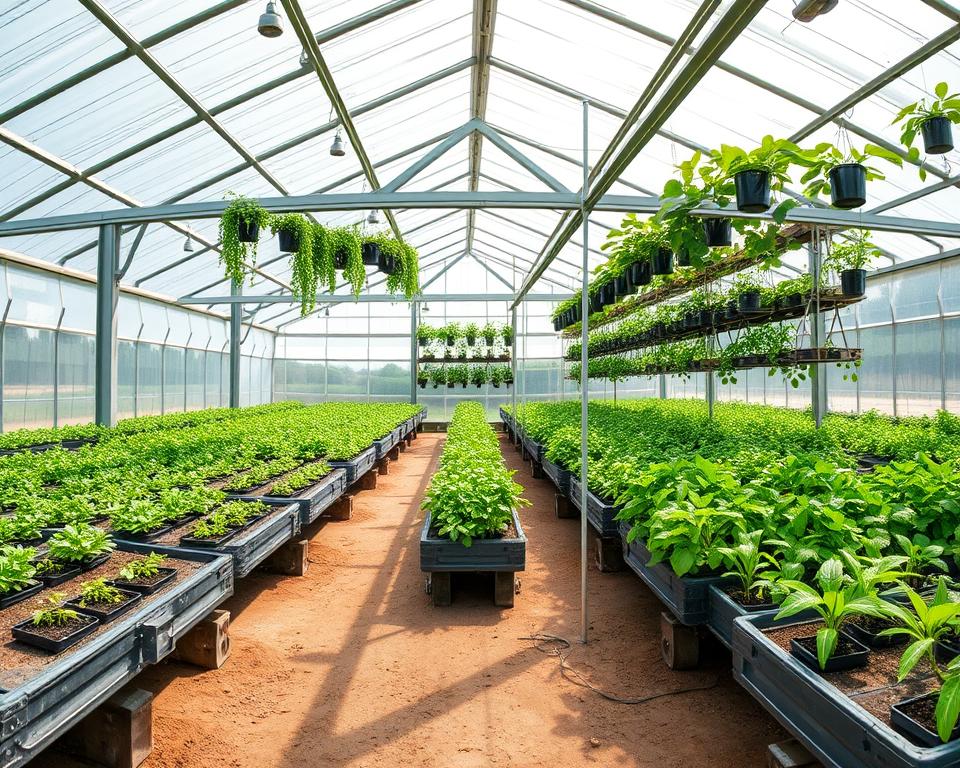
Stable benches and shelving make the biggest difference to safety. Fit benches to the base or floor so they cannot be lifted by gusts. Place compost bags, water tanks and machinery centrally and low to lower the centre of gravity.
Metal shelving should be bolted to the frame or base. Treat timber benches and check regularly for rot to avoid failure in wet weather. These choices reinforce a storm-ready greenhouse layout and reduce the chance of overturning.
Group pots on benches that have raised lips to stop slipping. Use trays with drainage holes to prevent water build-up and movement. For hanging displays, use rated hooks and anti-sway fittings and lower or remove them in windy months.
Anchor irrigation lines and pumps with clips and clamps to stop hoses flapping free. Mount pumps on secured platforms to avoid displacement in standing water. Use weighted containers or ratchet straps for large planters to secure pots in greenhouse during a surge.
Create modular zones so vulnerable plants can be moved fast to inner walls or lower benches. Keep designated stacking areas for fragile stock and maintain clear access routes for rapid transfer.
Prepare a compact storm kit containing tie-downs, tarpaulins, spare screws and a cordless drill. Drill and rehearse a plan so one person can anchor greenhouse equipment and secure critical items within minutes.
| Item | Recommended Action | Benefit |
|---|---|---|
| Fixed benches | Bolt to base or floor; use treated timber or metal frames | Prevents uplift; provides stable workspace |
| Heavy items (tanks, compost) | Keep central and low; use concrete pads or secured platforms | Lowers centre of gravity; reduces overturn risk |
| Pots and trays | Group on raised-lip benches; use draining trays and weights | Stops sliding and waterlogging; helps secure pots in greenhouse |
| Hanging baskets | Use rated hooks and anti-sway fittings; lower in storms | Reduces sway and fall risk |
| Irrigation pumps and lines | Clip lines to structure; mount pumps on anchored platforms | Prevents displacement; maintains water supply |
| Tie-down kits and straps | Store in storm kit; use to fasten lightweight items and planters | Quick securing method to anchor greenhouse equipment |
Preparing for Storms: Maintenance and Practical Checklists
A short, regular maintenance routine keeps a greenhouse resilient through the seasons. Use a clear greenhouse maintenance checklist to spot problems early, reduce repair costs and keep plants safe. The notes below break tasks into simple actions you can complete in an hour or over a weekend.
Regular inspection checklist for seasonal maintenance
- Check frame fixings, brackets and bolts for corrosion or loosening; tighten or replace stainless or galvanised fastenings.
- Inspect glazing seals, beads and gaskets for cracks; fit new EPDM or foam seals where needed to stop drafts and leaks.
- Clear gutters, downpipes and base drainage; remove debris and test outlets to prevent water pooling at the foundation.
- Examine timber for rot and treat or replace affected pieces; verify anchor points and base for signs of subsidence.
- Test vents, automatic openers and door hardware; lubricate moving parts and replace worn stays or hinges.
Storm readiness checklist greenhouse
- Secure all doors and vents; fit wind-resistant stays and lock fastenings before a forecasted gale.
- Move lightweight pots and trays to inner benches or into the house; lower or remove tall, top-heavy plants.
- Tie down or relocate external water butts, compost bins and garden furniture that could become airborne.
- Apply temporary storm sheets or plyboard to vulnerable panels when severe weather is predicted; ensure gutters are clear.
- Turn off or shelter external electrical items; protect heaters, thermostats and timers from water ingress.
Tools and spare parts every greenhouse owner should keep
| Category | Items | Purpose |
|---|---|---|
| Hand and power tools | Cordless drill, screwdriver set, hacksaw | General repairs, drilling out stripped fixings and cutting brace pieces |
| Fixings & seals | Spare screws (stainless/galvanised), coach bolts, washers, silicone sealant, EPDM strips | Replace corroded fastenings and reseal glazing to prevent leaks |
| Glazing & clips | Panel clips, spare glazing panels, polycarbonate offcuts | Quick replacement for cracked panels and blown-out sections |
| Bracing & straps | Ratchet straps, cable ties, bracket kits, small timber/metal offcuts | Temporary or permanent bracing to resist uplift and racking |
| Safety & power | Gloves, eye protection, sturdy boots, first-aid kit, torch, portable generator | Protect personnel and maintain essential systems after a storm |
| Documentation | Manufacturers’ manuals, warranties in a waterproof folder | Reference for correct parts and for insurance claims |
Keep a simple inventory of greenhouse tools and spares. Rotate consumables, top up sealant and test emergency items each season. A tidy kit saves time when following a storm readiness checklist greenhouse and makes routine tasks from the greenhouse maintenance checklist faster and safer.
Insurance, Legal Considerations and Local Regulations
Knowing how insurance, planning rules and records interact saves time after a storm. Check your policy terms and local council guidance before making changes. Clear records and sensible choices reduce disputes and speed up repairs.
Many standard home policies include garden structure coverage for greenhouses. Confirm whether your greenhouse is treated as part of the buildings cover or as contents, and note any size or permanence limits. Contact traditional insurers such as Aviva, Direct Line or NFU Mutual to clarify whether glass, polycarbonate panels and plant loss from storms are insured.
For high-value glasshouses or those with expensive kit, consider specialist greenhouse insurance UK policies. They often offer tailored sums insured and cover for consequential losses such as heating or irrigation failure.
Planning permission and building regulations for permanent greenhouses
Small, ancillary greenhouses normally avoid planning permission greenhouse requirements if they meet height and footprint limits. Permanent bases, electrical installations or drainage works may trigger building regulation compliance or require notifications to your local authority.
If you live in a conservation area or a listed building, seek pre-application advice from the local planning authority. Professional installers and building control officers can advise on compliance, and retaining certificates for electrical and structural work helps with insurance claims and future saleability.
Documenting condition and damage for claims
Keep dated photographic records of your greenhouse before and after storms to document greenhouse damage. Photograph serial numbers on equipment and preserve receipts for heaters, vents and glazing.
Maintain a maintenance log and store inspection reports from recognised professionals. If you need to claim, make a safety assessment first, notify your insurer promptly and get multiple estimates from RICS-accredited builders or chartered surveyors when required.
Retain copies of all correspondence, contractor quotes and completion certificates. Clear documentation demonstrates reasonable care and supports a stronger claim under garden structure coverage and greenhouse insurance UK policies.
Post-Storm Recovery and Repair Best Practices
After a storm, start with calm, clear steps to protect people and property. Keep a safe distance from unstable structures and switch off electrical supplies if you spot water ingress or damaged wiring. Wear gloves and sturdy footwear before handling debris.
Photograph damage for insurers, then make temporary fixes to stop further harm. Secure torn polythene with tape, brace sagging frames and cover exposed areas with tarpaulins. If broken glass is present, remove fragments with thick gloves and dispose of them per local council rules.
Where the greenhouse poses a hazard to neighbours or public paths, cordon it off and contact a professional. Personal safety takes priority during all post-storm greenhouse recovery actions.
Safety steps to take immediately after a storm
Do not enter a structure that looks unstable. Switch off mains electrics if water or structural damage exists. Photograph the scene before any repair work to support claims and records.
Make short-term repairs to maintain watertightness and reduce wind exposure. Use bracing or temporary panels to stop further deterioration while you plan permanent work.
Assessing damage and prioritising repairs
Begin by triaging issues: make safe, then make watertight, then restore functionality. Prioritise frame damage and foundation movement, as these affect the whole structure.
Engage a structural engineer for severe deformation. Replace shattered glazing quickly with impact-resistant options to protect plants and irrigation. Keep receipts and a log of repairs for insurance and tax records.
Long-term improvements to prevent repeat damage
After immediate repairs, review weak points and upgrade anchors, panels or drainage. Consider adding hedging or windbreak fencing to reduce wind exposure around the greenhouse.
Adopt a maintenance plan and seasonal storm drills to stay ready. Compare the cost of repeated repairs with investing in a heavier-duty greenhouse or professional installation when evaluating long-term storm improvements.
| Action | Purpose | When to Do It |
|---|---|---|
| Remove debris and broken glazing | Reduce hazard and prevent plant damage | Immediately, using PPE |
| Photograph and document damage | Support insurance claims and records | Before any repairs |
| Temporary watertight repairs | Stop water ingress and further wind damage | Within hours of the storm |
| Structural assessment | Identify frame or foundation issues | Within days for suspected serious damage |
| Permanent glazing replacement | Restore protection and improve resilience | As soon as safe and insured |
| Install additional anchors and drainage | Prevent repeat uplift and flooding | During post-repair upgrades |
| Landscape windbreaks | Reduce wind speed and turbulence | Planned during long-term improvements |
Conclusion
Understanding local risks is the first step in making a greenhouse storm-proof. Assess exposure, consult Met Office forecasts and local council guidance, and use that insight to choose suitable materials and designs from reputable makers such as Halls, Palram and Hartley Botanic.
Prioritise robust foundations and anchors, reinforce glazing and doors, and adopt resilient greenhouse practices for everyday protection. These measures reduce plant loss, cut repair bills and improve safety, and they can also support discussions with insurers about greenhouse storm protection UK.
Carry out a site-specific risk assessment and focus retrofits on the greatest vulnerabilities: anchors, glazing and door security. Maintain a clear maintenance and storm-readiness regime, follow manufacturer specifications and keep records for insurance and compliance to make your greenhouse long-lasting and storm resilient.
FAQ
What are the most common storm hazards that affect greenhouses in the UK?
High winds cause uplift, frame distortion and glazing blowouts; flying debris can shatter glass or tear polycarbonate. Heavy rain and flash flooding lead to water ingress, rotting timber bases and undermined foundations. Hail damages glazing, while snow loads risk collapse in prolonged cold snaps. Coastal sites also face salt-laden winds that accelerate corrosion. Secondary effects include torn vents and broken doors that create temperature shock and plant loss.
How can I assess my greenhouse’s exposure to wind and other weather risks?
Conduct a simple site survey: map prevailing wind directions using Met Office data, note proximity to trees and buildings, check local topography and soil drainage. Classify the site as sheltered, semi-exposed or exposed. Avoid ridge tops and full-exposure coastal edges where possible. Use wind-rose information to orient the building, and consider microclimate factors such as reflected heat from walls and shelter from hedges.
Which greenhouse designs and materials perform best in high winds?
Heavier-duty frames—hot-dip galvanised steel or reinforced aluminium with cross-bracing—offer the best stiffness. Multi-wall polycarbonate (10–16 mm) gives excellent impact resistance and insulation; toughened or laminated safety glass is durable but more brittle to impact. Low-profile lean-to or lower-eaves designs reduce uplift. Choose manufacturers with published wind ratings, such as Halls, Palram or Hartley Botanic, and favour designs with continuous load paths and multiple fixing points.
What anchoring or foundation solutions are recommended for various soils?
For permanent installations, concrete footings and baseplate bolting give the highest stability. Ground screws (helical anchors) are faster to install, cause less disturbance and are effective in many soils—select size and depth to match wind loads. Earth anchors and driven rods suit lighter or temporary builds. Always ensure foundations are level to distribute loads evenly and include drainage to avoid waterlogging and freeze-thaw settlement.
How can I retrofit an existing greenhouse to make it more storm-proof?
Add cross-bracing, extra frame anchors and new gutter-to-base fixings. Replace single-skin glazing with twin- or multi-wall polycarbonate, install anti-throw beading and extra cleats, and strengthen doors with additional hinges and stronger latches. Bolt frames to concrete or ground screws where possible and upgrade mild-steel fixings to galvanised or stainless-steel fasteners. Check manufacturer warranties before major alterations and use professional installers for complex work.
What are practical ways to secure glazing and prevent panel blowouts?
Use manufacturer-specified beading, gasket systems and correct screw spacing. Fit secondary clips or cleats at panel ends and corners, replace degraded EPDM seals, and use neoprene washers on screws for polycarbonate. Overlap panels where possible and use locked interlocking systems. End closures and taped ventilation gaps help prevent water ingress. Keep spare panel clips and compatible sealants on hand for rapid repairs.
Which vents and door fittings best resist wind damage?
Choose vents with robust hinge systems, friction stays and locking positions so they can be held partially open without slamming. Install wind-stops or external baffles where vents face prevailing winds. Reinforce doors with extra hinge plates, longer coach bolts and anti-lift fittings. Heavy-duty hasps, slam-shut latches and padlockable catches help secure doors; removable internal bars provide additional restraint for severe weather.
How should I anchor shelving, pots and heavy equipment inside the greenhouse?
Anchor benches and shelving to the base rather than leaving freestanding units. Place heavy items centrally and low to lower the centre of gravity. Secure hanging baskets with rated hooks and anti-sway fittings, and anchor irrigation pumps and lines. Use weighted or fastened containers for large planters and keep a modular layout to move vulnerable stock quickly into sheltered zones before a storm.
What maintenance and pre-storm checks should I perform seasonally?
Inspect frame fixings, brackets and bolts for corrosion or loosening and lubricate moving parts. Check glazing seals, beads and gaskets and replace degraded EPDM. Clear gutters and downpipes, check timber for rot and verify anchor points for subsidence. Test vents, automatic openers and door hardware. Before an imminent storm, secure doors and vents, move lightweight items indoors, clear gutters and deploy temporary storm sheets or bracing if needed.
What essential tools and spare parts should every greenhouse owner keep?
Keep a cordless drill, stainless or galvanised screws, silicone or MS polymer sealant, EPDM gasket strips, spare panel clips and a few spare polycarbonate or toughened glass panels. Retain coach bolts, washers, ratchet straps, cable ties, brackets and small offcuts of timber or metal for emergency bracing. Maintain a safety kit with gloves, eye protection, sturdy boots, torch and a first-aid pack.
Are greenhouse repairs and damage usually covered by UK home insurance?
Many home insurance policies include garden buildings under contents or buildings sections, but cover varies by insurer and policy wording. Common exclusions include non-permanently fixed structures, commercial use or structures above specified value limits. Contact insurers such as Aviva, Direct Line or NFU Mutual to confirm cover for storm damage, glazing breakage and consequential plant loss. Keep photographic records, receipts and maintenance logs to support claims.
When might I need planning permission or building-regulation approval for a greenhouse?
Most small, ancillary greenhouses avoid planning permission if they stay below height and area thresholds and remain subordinate to the house. Permanent bases, drainage or electrical installations may require building-regulation compliance. Listed buildings or conservation areas often need pre-application advice from the local planning authority. Consult local council guidance and retain certificates for any electrical or structural work.
What immediate safety steps should I take after a storm damages a greenhouse?
Prioritise personal safety—do not enter unstable structures. Switch off electrical supplies if water ingress or damage is present. Photograph damage for insurance, make temporary repairs to prevent further water ingress using tarpaulins or bracing, and clear dangerous debris while wearing protective equipment. If the greenhouse poses a public hazard, cordon it off and seek professional assessment for structural instability.
How can I document condition and damage effectively for an insurance claim?
Keep dated photographic records of the greenhouse before and after storms, retain serial numbers for equipment and save receipts for parts and professional work. Maintain a maintenance log showing reasonable care. On significant damage, notify your insurer promptly, obtain multiple repair estimates and keep copies of all communication and contractor quotes to substantiate costs.
What long-term measures reduce the likelihood of repeat storm damage?
Strengthen identified weak points: add more anchors, fit stronger glazing or external storm sheets, improve drainage and raise thresholds. Consider landscaping windbreaks such as hedges or fences, reposition the greenhouse if feasible, and upgrade to a heavier-duty model or professional installation where recurring repairs are costly. Establish a regular maintenance schedule and rehearse a rapid-response storm checklist.